(Initially published March 2016, on my original blog)
Having given out my details and promising I’d blog at the Pi Birthday bash this weekend, I’d better crack on! Given the previous issues I needed a rethink on the design, key points:
- Build wall mounted from the start, to avoid issues when I finally came to hang it
- Weatherproof
- Improved frame
- Tensioned strips to keep them straight
- Short, heavy duty power cables
- Improved signal cables
- Connectors, connectors and connectors
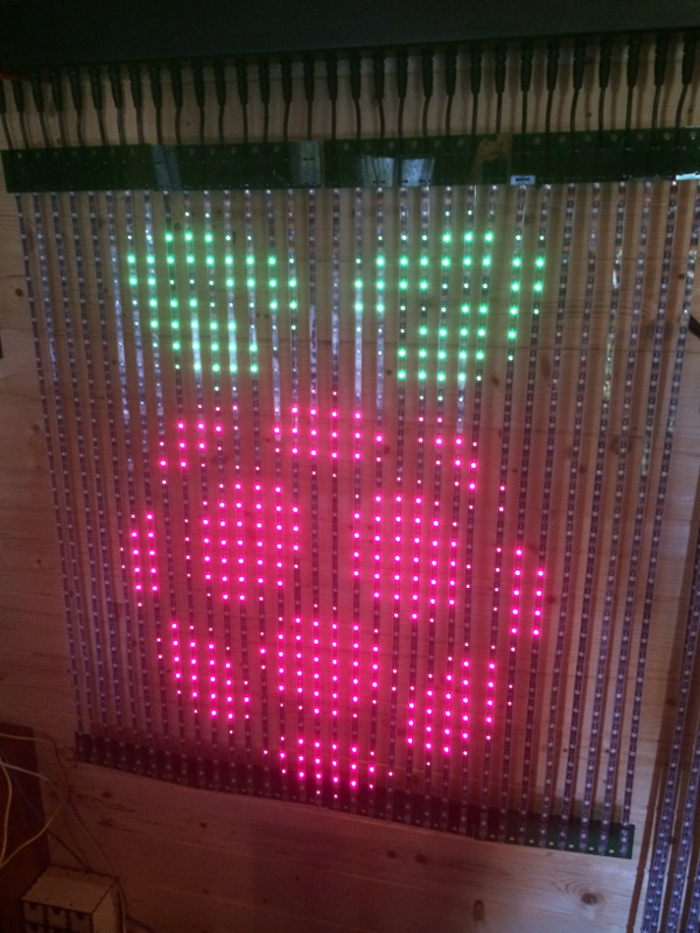
A quote from Brian Corteil was my mantra for this build: “If in doubt over engineer it, it’ll be easier to build initially and far better for reuse show after show”. So firstly the construction, thin conduit didn’t work and I wanted the strips to be tensioned so hanging vertically was the best option. To keep the weight down but still make the construction easy having a box of some sort with the strips hanging down from it seemed ideal. I settled on electrical trunking and 75mm square gave me plenty of room to play with. Ideally I wanted this to be black so that it would not stand out but the requirement for that was a huge order! So, white and a liberal application of matte black spray paint resolved that. Next hanging the strips vertically – this meant that I’d have to modify the code to rotate the image by 90 degrees which was part of the reason I’d dismissed it originally. A review of the Fadecandy documentation though gave me the answer very quickly, Micah had already solved this for me – with a simple config setting – BRILLIANT.
I also learnt a lot from the example on the Fadecandy site: https://learn.adafruit.com/1500-neopixel-led-curtain-with-raspberry-pi-fadecandy/overview with regard to constructing the screen. The LED strips are in a waterproof covering and I used hot glue to seal the ends with a 10mm glass ball. Unfortunately the only place I could find 10mm glass balls was Alibaba an the minimum order was 10,000 – so I have about 9000 spare if anyone needs any? For the connection to the trunking, which also needed to be waterproof, I investigated options and costs with a number of suppliers and ended up with a plastic screw threaded version I found on Alibaba. After a few emails backwards and forwards we agreed on the details and the supplier sent me comprehensive design documents. A few weeks later and the finished articles arrived exactly as I’d requested. The sockets bolted directly into the trunking and the plugs screwed into them. I soldered the strips to these and again sealed them with hot glue and heat shrink tubing. (Having now attended a few shows bayonet fittings would have been far easier). The Fadecandy cards as controllers for the strips were still the right way to go but with the previous version I had two problems related to the wiring, the first was the power. To get the 5v from the power supply box to the trunking was going to need some decent sized cables. Given that part of the problem I had with the initial version I wanted to make sure that this time was a success. The second issue was the wiring for the data lines to the addressable strips. On advice from Micah (Fadecandy designer) I replaced the previous twisted pair with ribbon cable with alternate connections being Ground and also used 16 way ribbon connectors with header pins soldered to the cards. This makes it easy to swap cards out if they are faulty or I wanted to use them elsewhere while the Wall is not in use. I grouped the strips into 8 and tie wrapped them onto laser cut perspex rectangles. This logically grouped the strips per Fadecandy card and also made them easier to carry when detached. Attaching them to a flat surface at the top and bottom of each strip meant that they were held facing forwards to get the best light from the LEDs. Finally into the trunking went the Raspberry Pi as before with the Fadecandy server installed. Unfortunately at this point I realised my next mistake with the power – with all of the LEDs on there was insufficient power to run the Pi! This was easily solved by running a mains lead into the trunking and adding an adapter specifically for the Pi. Longer term I’ll change that. So finally I had a working screen – only half the size of the clients requirement but that would be easily remedied by building another duplicate ‘half’ and connecting the two together when needed.
I exhibited at the UK Makerfaire in Newcastle and it looked pretty good.


