(Initially published Oct 2015, on my original blog)
It’s taken a while (the original post was Feb!) but it’s time to tell the story of the full size screen, which I’ve named ‘The Wall of Enlightenment’. As a reminder the aim was to build a 2 metre wide, 1 metre high screen which could be hung on the side of the Pitt building in Cambridge as part of Science week.
Having created the initial small prototype my intention was to use the same materials, and scale it up. The prototype went down well at the Guildhall exhibition and I was given the green light to build the full size screen. Ordering 75m of LED strips from China was an interesting experience but once I’d got through the complexities of sending the money they arrived within a week. Construction could then be started on the floor of my home office.

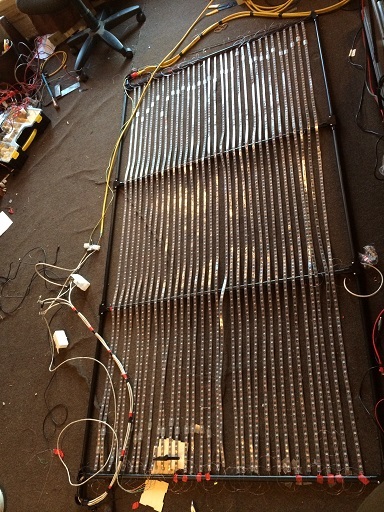
The Wall is based around a Raspberry Pi which then uses Fadecandy cards to control the addressable LED strips. The maximum length of these before any lag is visible is estimated to be 64, from details on the Fadecandy site. With 32 LED per metre strips that gave me the 2 metre width I was looking for, so I started by cutting the strips and constructing the frame around them from 25mm black plastic conduit.

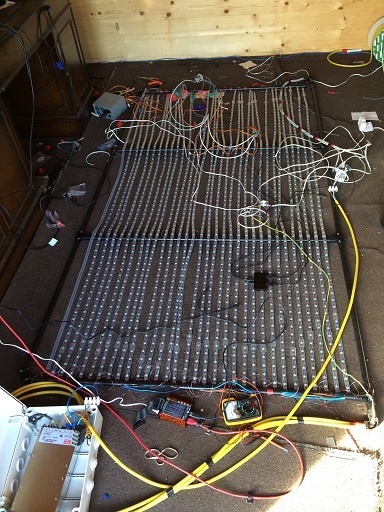
Using the same aspect ration on the vertical meant that I needed 32 rows and with 8 strips per Fadecandy that was 4 cards. As these were small my intention was to hide them inside the trunking but to get things running initially I wired them up outside. I also added a length of nylon line to the end of each strip and sealed the end with hit glue and heat shrink tubing. This would make it waterproof and the line could be used to tension the strips so that they didn’t sag once the screen was hanging in position. Once I had the first 8 lines connected I tested to ensure things were working as expected. I used the fadecandy server on the pi and streamed a video from my laptop. At a friends suggestion I used the ipod video advert as it was great for motion and colours. The result was great and can be seen here Once I knew that worked I was confident that I could complete the rest the same way and after many long nights of soldering, sticking and threading wiring the construction was complete.
So, time to fire up this gigantic beast and enjoy the fruits of my labours, again the same video with the result here. However, something wasn’t right. There was way more ‘noise’ on the display and the colours were not consistent. Something was wrong and this wouldn’t be good enough for the display. I started to look at the wiring, the connections, the power levels to determine where the issue was. I also posted on the fadecandy google group and got some great feedback. Unfortunately the more I did the worse it got, with complete strips starting to die and more and more noise. Here’s the last test with some scrolling text: https://www.youtube.com/watch?v=wWNaVCvFfiM At this point time wise it was the first day that the screen was due to be on display but there was no way it was up to that, it was dead on the office floor.
This wasn’t going to beat me. I needed a rethink and some new ideas, while continuing with the design I had may have worked there were some issues that had arisen that really needed to be addressed:
- Needed to be weatherproof, there were holes all over the tubing for the strips and the nylon tensioners which would have been likely to leak
- The frame itself was too weak to be rigid when transported or when hung on the wall
- The strips needed to be tensioned to maintain the integrity of the image
- The power cables needed to be thick and short to transfer the 5v from the power supply to the strips
- Construction on the floor meant I didn’t think about handing it or the support required
- Thin conduit was what I had, worked well in the prototype, was thin and looked good but was not strong enough or large anough to contain all of the cabling
- Electrical interference appeared to be due to the way it was wired, using twisted pair for signal lines
- It was hugely difficult feeding the wires through the tubes
- I’d soldered the fadecandy cards directly which made it very difficult to change their configuration or position
So I sat down with some friends at Makespace later that week and we designed version 3.